Upgrading the Jetting on a Kawasaki KLX 140
By Marcus Wilcox
knightofroost@gmail.com
Revised: 2/21/2013
I have two 2009 Kawasaki KLX 140 motorcycles for the kids. They are jetted extremely lean, making them hard to start and slow to warm up. In addition, the fuel screw is not adjustable from the factory. There are some posts on the web discussing what upgrades work, but no installation guides. Below are instructions to upgrade the pilot jet, main jet, fuel screw, and add a fuel filter.
Tools
- 8 mm, 10 mm, 12 mm end wrenches and/or sockets
- 7 mm end wrench
- Flathead screwdriver
- Philips screwdriver
- Narrow needle nose pliers
- Regular pliers
- Hacksaw
- Cutting pliers / snips
To Purchase
- Keihin Slow Jet Size 40 (Jets R Us SKU N424-74C)
- Keihin Main Jet Size 100 (Jets R Us SKU 99101-116)
- 3.2 mm or 0.14 in ID Washer (JRU-8032)
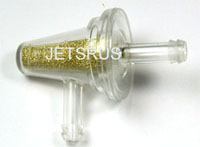
- Fuel Filter
- Fuel Hose Clamps (the stock ones are crap)
- Carb bowl screws socket head cap screws
- Short arm ball end hex key
Supplies
- Carburetor Cleaner (Spray Can w/Nozzle)
- Rags
Time
- This should take about an hour if you don’t lose anything, have to go to the store, or break something that turns a small project into a monster.
Removal of Carburetor
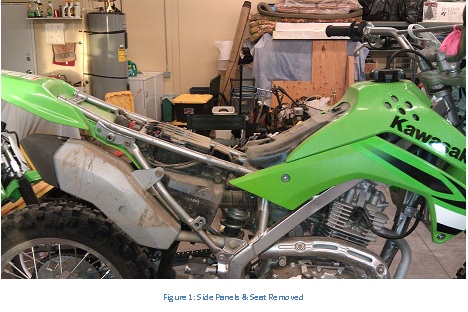
- Remove two white plastic side panels (8 mm).
- Remove seat (10 mm & 12 mm).
- Remove green plastic tank cover & shroud (8 mm & Philips). You will need to remove the gas cap to lift it off, and then replace the gas cap.
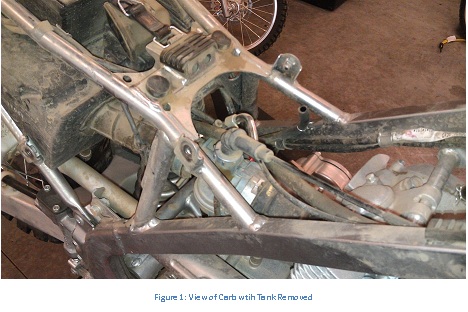
- Turn off gas petcock.
- Remove bolt from the front of the gas tank (8 mm) and the rubber strap at the back of the tank.
- Lift the tank up enough to easily access the fuel line from the carb to tank. Remove the gas line at the petcock. (Pliers for clamp). Set the gas tank aside. Perhaps put a rag underneath the petcock to catch any fuel that leaks out.
- Loosen the clamps at the front and back of the carburetor enough that you can side each away from the carb on the rubber boots. (Phillips)
- With both hands, push the carburetor back until it clears the manifold boot. Turn it sideways and then pull out of the air cleaner boot. At this point the carburetor should be free except for the throttle cable and choke cable.
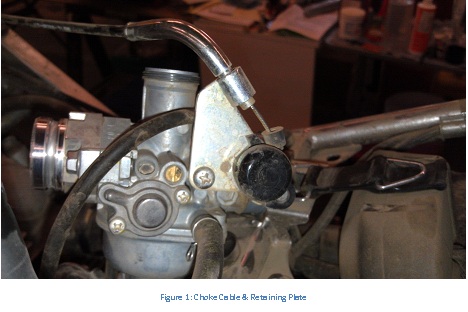
- Unscrew the top of the carburetor and lift out the slide mechanism. (There is a vent line that crosses the top of the carb, this allows it to be pulled to the side and allow lifting of the carb later).
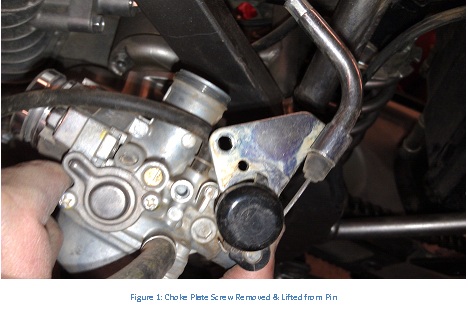
- Remove choke cable plate retaining screw (Phillips), lift it away from the retaining pin, and rotate it clockwise on the black plastic portion to remove the plate and cable away from the carb. (This took a bit of manipulation, don’t force or break anything. Note how it comes off so it goes back on the same way).
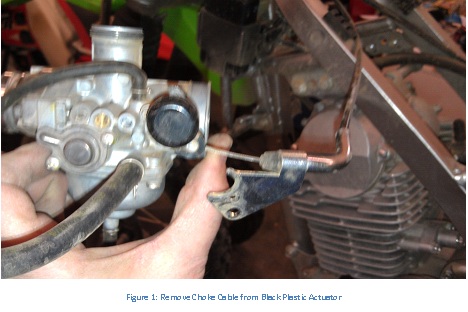
- Remove choke cable from black plastic choke actuation mechanism.
- The carb is now completely free from the engine.
Replacement of Jets
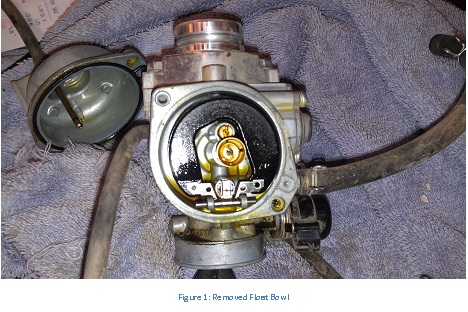
- Lay rags on your work area for the carb. Turn the carb upside down. Remove the two Phillips screws that hold the float bowl in place and remove the float bowl.
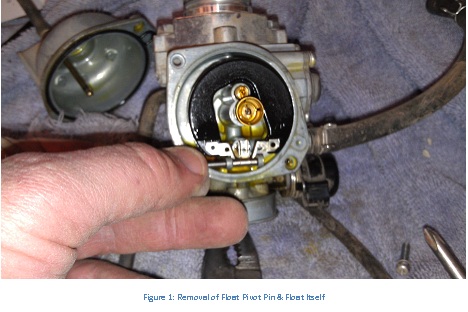
- Remove the float assembly. It rotates on a removable pin that slides out. Carefully lift the float away and keep the float needle on it if possible. (Note: You don’t HAVE to remove the float to replace the jets. However, I’d recommend removing it to allow full cleaning, inspection and familiarity with your bike).
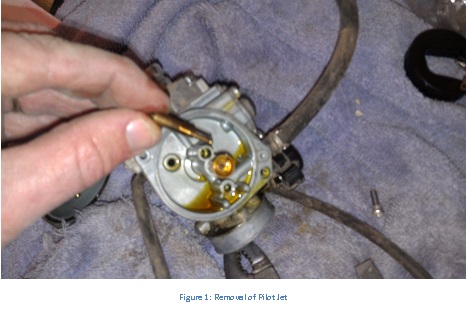
- With a flat screwdriver, remove the pilot jet.
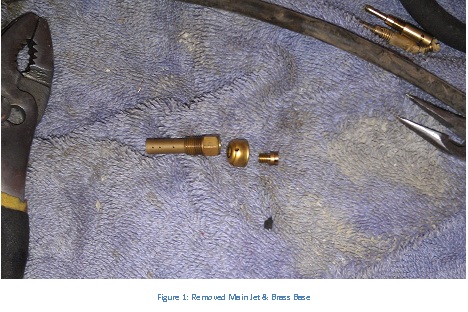
- Then remove the main jet. When you remove the main jet, it may also screw out the brass base. You can hold the brass base in place on the carb body with a 7 mm wrench, or remove the main jet from the base.
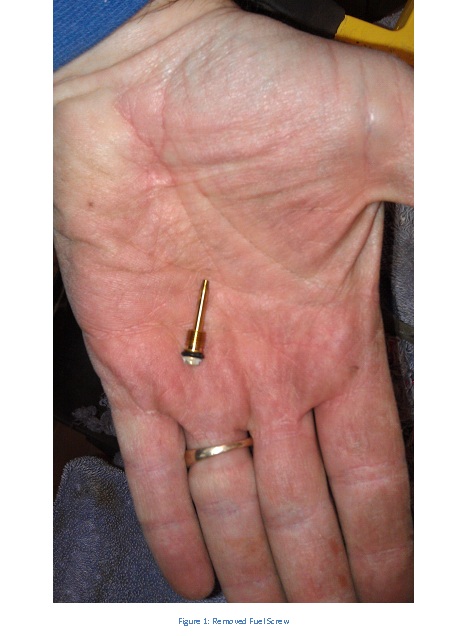
- With narrow needle nose pliers, remove the fuel screw.
- Spray carb cleaner into each opening of the carb.
- Replace the stock 38 pilot jet with a 40.
- Replace the stock 95 pilot jet with a 100.
- Replace the float mechanism. Ensure the float needle is properly located. (You will test it for proper function later).
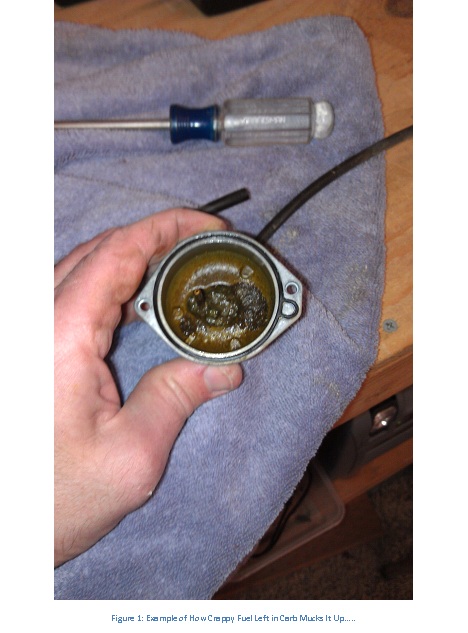
- If dirty, clean the float bowl with carburetor cleaner. Ensure that the drain line isn’t plugged and flows when the drain screw is opened.
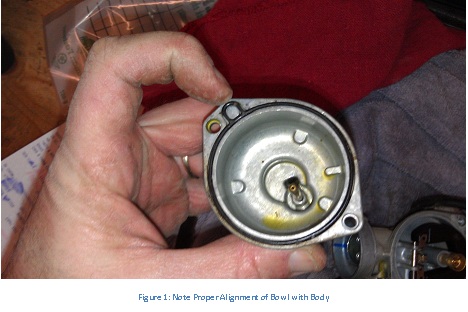
- Reinstall the float bowl. Ensure the sealing o-ring matches correctly.
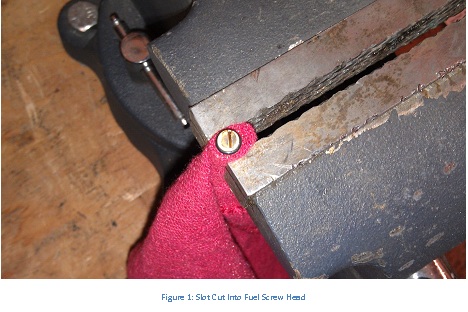
Modification of Fuel Screw
- Wrap the fuel screw with a rag. Put it in a vice with the threads above the top of the vice. The vice only needs to be tight enough to hold the screw still as you saw a slot in it.
- With a hacksaw, carefully cut a slot in the top of the fuel screw. Go slowly, don’t go too deep. (Consider creating a slot that is parallel to the flat side of the screw head to give the longest slot length).
- Reinstall the fuel screw into the carburetor. Turn all the way in until gently seated. Turn back out 1.5 turns (as a good starting point).
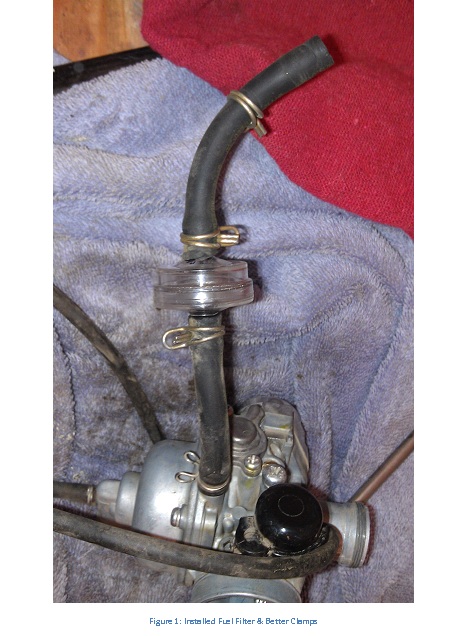
Installation of Fuel Filter
- Although not mandatory, consider installing an in-line fuel filter.
- Cut the fuel line at the mid-point.
- Install the fuel filter along with new (4 better) fuel line clamps all the way around.
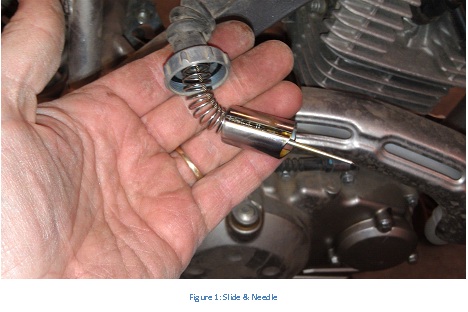
Shimming Slide Needle
- Remove the throttle cable from the slide mechanism. To do this, lift the spring away from the slide (scrunch it up with your fingers like a slinky), then push the throttle cable down and out of the slide body. This will free the slide from the cable.
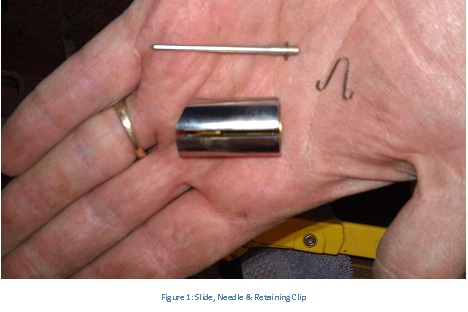
- Back at your work area, remove the needle retaining clip from inside the slide. Or, you can gently push the needle up and it will push the clip out. (Be careful, don’t shoot anything across the room).
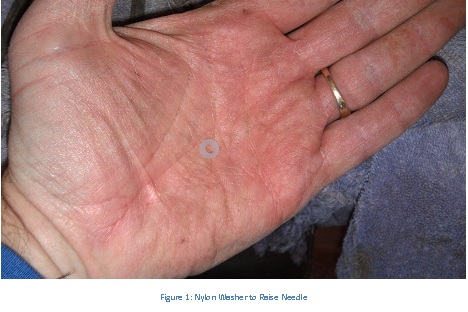
- Place one of the new nylon washers under the existing needle clip and drop the needle back into the hole in the slide. (This will raise the needle slightly).
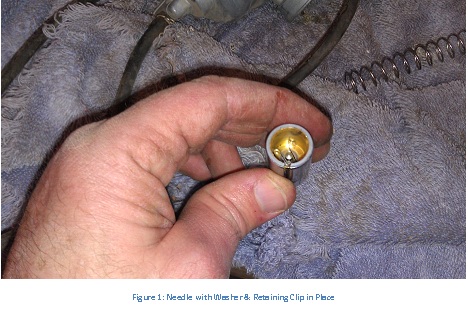
- With a small flathead screwdriver or needle nose pliers, return the W-shaped retaining clip into the top of the slide to hold the needle clip down.
- Reinstall slide onto throttle cable. You will need to scrunch the spring again to return the throttle cable to its original slot.
Reinstallation
- Reinstall the choke mechanism cable and plate onto the carb. This may take a bit of finagling.
- Reinstall the carburetor. It helps to spray a bit of WD-40 on the carb and rubber boots where they mate to slide the carb in easier. Properly locate and tighten the two rubber boot clamps.
- Properly route the 3 carburetor vent lines down and through the area in front of the swingarm.
- Relocate the vacuum line across the top of the carb and then reinstall the throttle slide.
- Sit the gas tank on top of the bike in a way that you can easily connect the fuel line to the petcock.
- Drop the gas tank into position, but don’t bolt it into place yet.
- Ensure the fuel line is not kinked.
- Ensure the throttle opens and snaps back properly.
- Open the petcock in preparation for a test. Do you see gas flow through the fuel filter into the carb? Is the float operating correctly (you don’t want any fuel running out of the float bowl overflow vent).
- Start the motorcycle. If everything is OK, it should start right up.
- Finish buttoning up. Bolt the gas tank down and connect the rear rubber retainer. Install the green tank cover and shroud. Install the seat. Reinstall the two white side panels.
Set Fuel Screw & Idle Speed
- Raise the idle speed a bit.
- Tune the fuel screw (there are lots of articles on this on the internet). With the warm and running, turn in the fuel screw until it nearly kills the engine. Then open it slowly until the speed peaks. I usually go back in ¼ to ½ turn from this point. On both bikes, this point was at 1.5 turns out from seated.
- Set the idle at the speed you want.
My Experience
The bike used to require full choke, extended turning over, and possibly a squirt of starting fluid to get it started. I retrofit two KLX 140s with the modifications above and they both started without choking within 1 or 2 seconds of cranking over. A ride on each showed them to be substantially improved in power, responsiveness and time to warm up.
Cautions & Recommendations
- All bolts should go back in easily. If not, don’t force it and cross-thread. This is particularly true of the bolt holding the front of the gas tank as well as the bolts for the plastic panels.
- Take photos as you disassemble everything. You may need some help remembering how to put it back.
- A stand will make this project and others much easier. I really like the Greg Smith ATLAS stand:
http://www.gregsmithequipment.com/ATLAS-Motocross-Lift-Red
- Put the old jets in a plastic bag, and write a note about what you installed. If you sell the bike, the next owner will appreciate your diligence and consideration.
- Buy a few extra nylon spacers, they are only $0.33 and dropping or losing your only one in the middle of the project would cost you more in gas to drive back to the store.
- This guide shows a straight fuel filter. It may be better to install one that connects to the hoses in a 90°F configuration, perhaps like this: